
Merhaba
Bu yazimizda Microsoft’un yeni sunuuc işletim sistemi olan Windows Server 2016 üzerinde Hyper-V kurulumu ve yapılandırmasını anlatiyor olacağız.
Peki Hyper-V Nedir ?
Hayatimiza Windows Server 2008 Hyper-V 1.0 ile giriş yapan Hyper-V rolü Windows Server 2008 R2 de Hyper-V 2.0 olarak anildi. Windows Server 2012 de Hyper-V 3.0 olarak anilmaya başlandi hayatimizdaki önemli bir hal almiş oldu. Windows Server 2016 ile birlikte bir çok özelliği ile karşımıza çıktı.
Hyper-V şirketlerin sunucu kullanımını arttırarak ve donanım ve yazilim maliyetlerini minimum indirmek ve IT yöneticilerin iş yüklerini konsolide etmesini sağlayan Hypervisor tabanlı sunucu sanallaştırma ürünüdür. Daha önceki sunucu işletim sistemlerinde Active Directory Domain Services, DHCP Server, DNS Server v.b. gibi rolleri ortamimizin ihtiyaçlari doğrultusunda ayni sunucu üzerine kurulumu ve yapılandırmasini yaparak kullanabiliyorduk. Hyper-V Server rolü bu rollerden ayri olarak kurulumu ve yapılandırılmasi yapılmasi gereken ve kurulduğu sunucu üzerinden sadece Hyper-V rolünü çalıştırmasi gerektiğini belirtmek isterim. Microsoft’un yaptığı açıklamalarda da Hyper-V rolünün kurulu olduğu bir sunucu üzerine başka bir rolün kurulmasi ve yapılandırılmasi asla önerilmemektedir. Yani üzerinde Hyper-V rolü dışında herhangi bir rolün kurulumu ve yapılandırılmasi asla önerilmemektedir.
Windows Server 2016 Hyper-V Özellikleri
Supported Windows Server guest operating systems
The following table lists the Windows Server operating systems supported in Windows Server 2016 for use as guest operating systems in Hyper-V virtual machines, as well as provides information about integration services.
| Guest operating system (server) | Maximum number of virtual processors | Integration Services | Notes |
|---|---|---|---|
| Windows Server 2016 | 64 | Built-in | |
| Windows Server 2012 R2 | 64 | Built-in | |
| Windows Server 2012 | 64 | Built-in | |
| Windows Server 2008 R2 with Service Pack 1 (SP 1) | 64 | Install the integration services after you set up the operating system in the virtual machine. | Datacenter, Enterprise, Standard and Web editions. |
| Windows Server 2008 with Service Pack 2 (SP 2) | 4 | Install the integration services after you set up the operating system in the virtual machine. | Datacenter, Enterprise, Standard and Web editions (32-bit and 64-bit). |
| Windows Home Server 2011 | 4 | Install the integration services after you set up the operating system in the virtual machine. | |
| Windows Small Business Server 2011 | Essentials edition 2
Standard edition 4 |
Install the integration services after you set up the operating system in the virtual machine. | Essentials and Standard editions. |
Supported Windows client guest operating systems
The following table lists the Windows client operating systems supported in Windows Server 2016 for use as guest operating systems in Hyper-V virtual machines, as well as provides information about integration services.
| Guest operating system (client) | Maximum number of virtual processors | Integration Services | Notes |
|---|---|---|---|
| Windows 10 | 32 | Built-in | |
| Windows 8.1 | 32 | Built-in | |
| Windows 8 | 32 | Upgrade the integration services after you set up the operating system in the virtual machine. | |
| Windows 7 with Service Pack 1 (SP 1) | 4 | Upgrade the integration services after you set up the operating system in the virtual machine. | Ultimate, Enterprise, and Professional editions (32-bit and 64-bit). |
| Windows 7 | 4 | Upgrade the integration services after you set up the operating system in the virtual machine. | Ultimate, Enterprise, and Professional editions (32-bit and 64-bit). |
| Windows Vista with Service Pack 2 (SP2) | 2 | Install the integration services after you set up the operating system in the virtual machine. | Business, Enterprise, and Ultimate, including N and KN editions. |
Guest operating system support on other versions of Windows
Use the topics in the following table for information about guest operating systems supported for Hyper-V on other versions of Windows.
| Host operating system | Topic |
|---|---|
| Windows 10 | Supported Guest Operating Systems for Client Hyper-V in Windows 10 |
| Windows Server 2012 R2 and Windows 8.1 | – Supported Windows Guest Operating Systems for Hyper-V in Windows Server 2012 R2 and Windows 8.1 – Linux and FreeBSD Virtual Machines on Hyper-V |
| Windows Server 2012 and Windows 8 | Supported Windows Guest Operating Systems for Hyper-V in Windows Server 2012 and Windows 8 |
| Windows Server 2008 and Windows Server 2008 R2 | About Virtual Machines and Guest Operating Systems |
Maximums for virtual machines
These maximums apply to each virtual machine. Not all components are available in both generations of virtual machines. For a comparison of the generations, see Should I create a generation 1 or 2 virtual machine in Hyper-V?
| Component | Maximum | Notes |
|---|---|---|
| Checkpoints | 50 | The actual number may be lower, depending on the available storage. Each checkpoint is stored as an .avhd file that uses physical storage. |
| Memory | 12 TB for generation 2; 1 TB for generation 1 |
Review the requirements for the specific operating system to determine the minimum and recommended amounts. |
| Serial (COM) ports | 2 | None. |
| Size of physical disks attached directly to a virtual machine | Varies | Maximum size is determined by the guest operating system. |
| Virtual Fibre Channel adapters | 4 | As a best practice, we recommended that you connect each virtual Fibre Channel Adapter to a different virtual SAN. |
| Virtual floppy devices | 1 virtual floppy drive | None. |
| Virtual hard disk capacity | 64 TB for VHDX format; 2040 GB for VHD format |
Each virtual hard disk is stored on physical media as either a .vhdx or a .vhd file, depending on the format used by the virtual hard disk. |
| Virtual IDE disks | 4 | The startup disk (sometimes called the boot disk) must be attached to one of the IDE devices. The startup disk can be either a virtual hard disk or a physical disk attached directly to a virtual machine. |
| Virtual processors | 240 for generation 2; 64 for generation 1; 320 available to the host OS (root partition) |
The number of virtual processors supported by a guest operating system might be lower. For details, see the information published for the specific operating system. |
| Virtual SCSI controllers | 4 | Use of virtual SCSI devices requires integration services, which are available for supported guest operating systems. For details on which operating systems are supported, see Supported Linux and FreeBSD virtual machines and Supported Windows guest operating systems. |
| Virtual SCSI disks | 256 | Each SCSI controller supports up to 64 disks, which means that each virtual machine can be configured with as many as 256 virtual SCSI disks. (4 controllers x 64 disks per controller) |
| Virtual network adapters | 12 total: – 8 Hyper-V specific network adapters – 4 legacy network adapters |
The Hyper-V specific network adapter provides better performance and requires a driver included in integration services. For more information, see Plan for Hyper-V networking in Windows Server 2016. |
Maximums for Hyper-V hosts
These maximums apply to each Hyper-V host.
| Component | Maximum | Notes |
|---|---|---|
| Logical processors | 512 | Both of these must be enabled in the firmware:
– Hardware-assisted virtualization The host OS (root partition) will only see maximum 320 logical processors |
| Memory | 24 TB | None. |
| Network adapter teams (NIC Teaming) | No limits imposed by Hyper-V. | For details, see NIC Teaming. |
| Physical network adapters | No limits imposed by Hyper-V. | None. |
| Running virtual machines per server | 1024 | None. |
| Storage | Limited by what is supported by the host operating system. No limits imposed by Hyper-V. | Note: Microsoft supports network-attached storage (NAS) when using SMB 3.0. NFS-based storage is not supported. |
| Virtual network switch ports per server | Varies; no limits imposed by Hyper-V. | The practical limit depends on the available computing resources. |
| Virtual processors per logical processor | No ratio imposed by Hyper-V. | None. |
| Virtual processors per server | 2048 | None. |
| Virtual storage area networks (SANs) | No limits imposed by Hyper-V. | None. |
| Virtual switches | Varies; no limits imposed by Hyper-V. | The practical limit depends on the available computing resources. |
Failover Clusters and Hyper-V
This table lists the maximums that apply when using Hyper-V and Failover Clustering. It’s important to do capacity planning to ensure that there will be enough hardware resources to run all the virtual machines in a clustered environment.
To learn about updates to Failover Clustering, including new features for virtual machines, see What’s New in Failover Clustering in Windows Server 2016.
| Component | Maximum | Notes |
|---|---|---|
| Nodes per cluster | 64 | Consider the number of nodes you want to reserve for failover, as well as maintenance tasks such as applying updates. We recommend that you plan for enough resources to allow for 1 node to be reserved for failover, which means it remains idle until another node is failed over to it. (This is sometimes referred to as a passive node.) You can increase this number if you want to reserve additional nodes. There is no recommended ratio or multiplier of reserved nodes to active nodes; the only requirement is that the total number of nodes in a cluster can’t exceed the maximum of 64. |
| Running virtual machines per cluster and per node | 8,000 per cluster | Several factors can affect the real number of virtual machines you can run at the same time on one node, such as: – Amount of physical memory being used by each virtual machine. – Networking and storage bandwidth. – Number of disk spindles, which affects disk I/O performance. |
Kurulum ve yapılandırmaya geçmeden önce ortamimizla ilgili kısa bir bilgi aktarmak istiyorum.
Birinci sunucum W16DC isminde ve üzerinde Active Directory Domain Services yapılandırılarak bakicubuk.local isminde bir domain ortami kurulmuştur.
İkinci sunucum W16HYPERV isminde ve domain ortamina dahil edilmiş durumdadir bu sunucum üzerine Hyper-V rolünü kurulumunu ve yapılandırılmasi yapacağım.
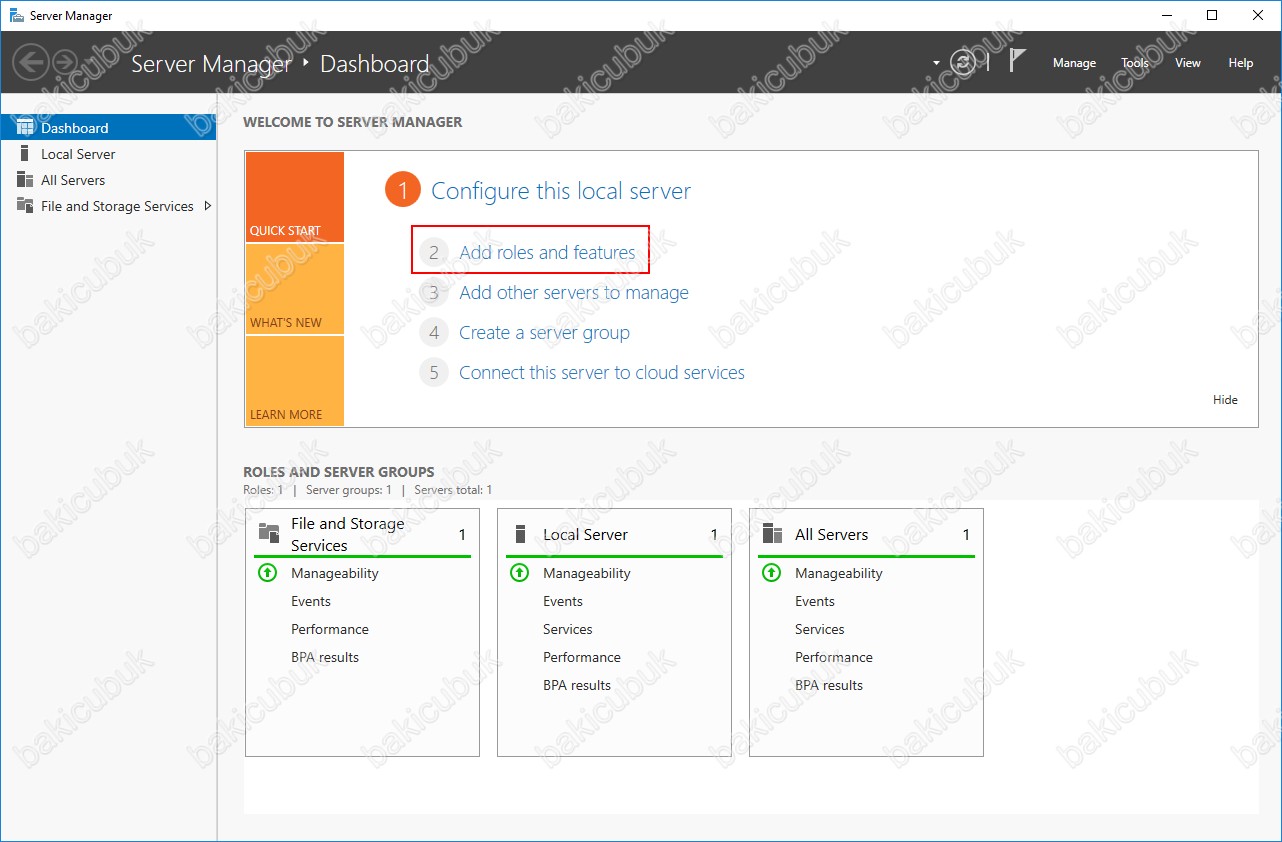
Server Manager konsolunu açıyoruz. Dashboard ekraninda Add roles and Features tikliyoruz. Dilerseniz sağ üst köşedeki Manage menüsünden Add Roles and Features ile rol ekleme sihirbazını açabiliriz.
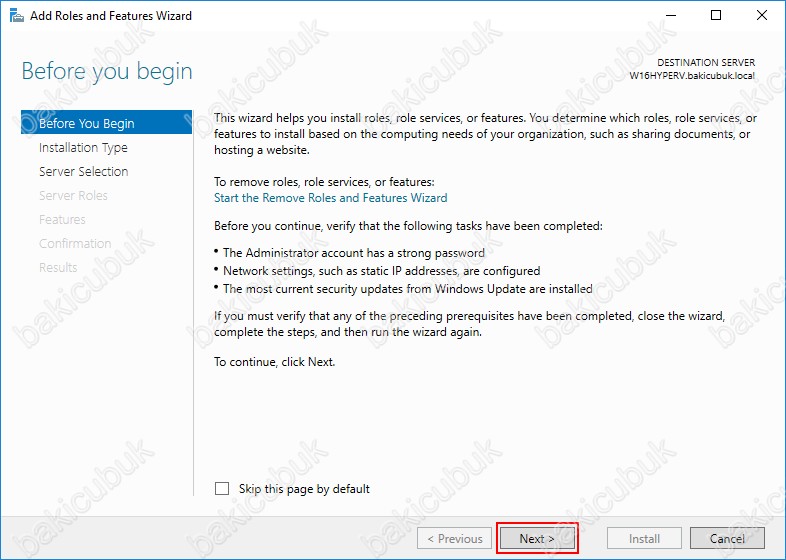
Add Roles and Features Wizard bilgi ekrani geliyor karşımıza kuruluma devam etmek için Next diyerek devam ediyoruz.
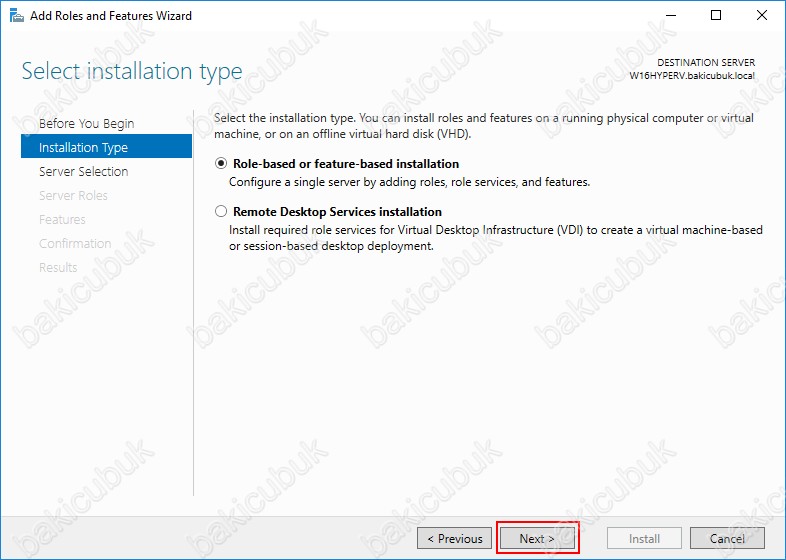
Select Installation Type ekraninda Role-based or Features-based Installation kurulum standart bildiğimiz rol ve özelliklerin kurulumunu yapabileceğimiz bölümdür. Biz Hyper-V rolünün kurulumu yapacağımız için Role-based or Features-based Installation seçerek Next diyerek devam ediyoruz.
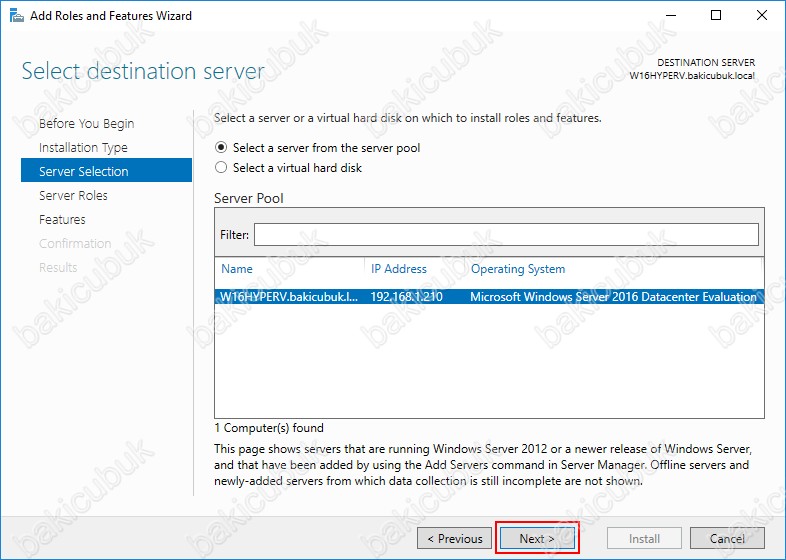
Select destination server ekraninda kurulumu hangi sunucu üzerinde yapılacak ise o sunucuyu seçmemiz gerekiyor. Ben W16HYPERV üzerinde Hyper-V rolünü kurulumunu yaparak yapılandırıacağım için bu sunucumu seçiyorum ve Next diyerek yapılandırmaya devam ediyoruz.
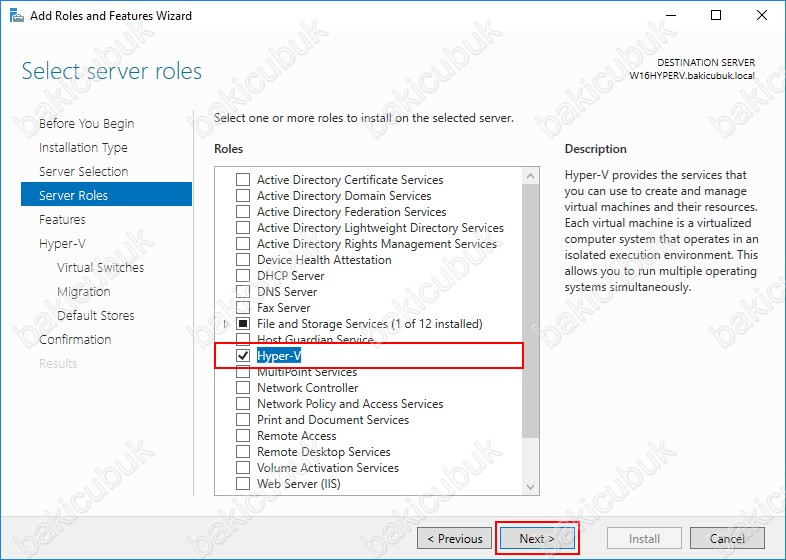
Select server roles ekraninda Hyper-V rolünün kurulumunu gerçekleştireceğimiz için Hyper-V rolünü işaretliyoruz.

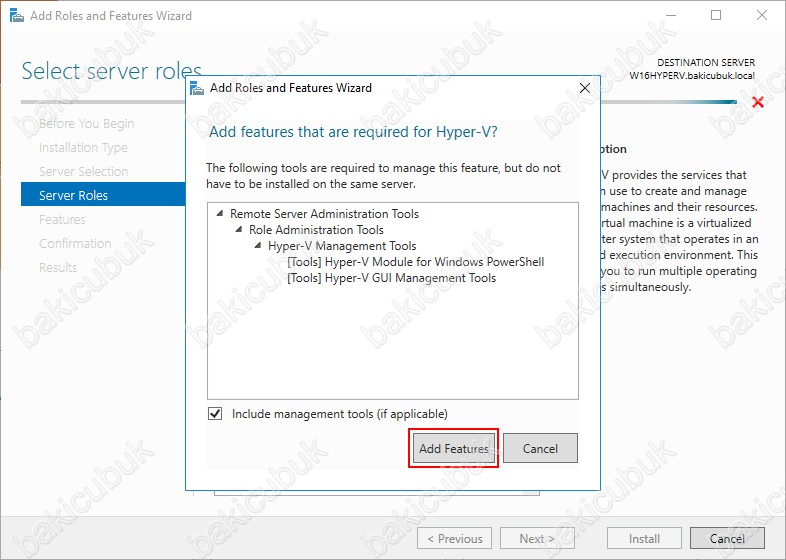
Hyper-V rolünü seçtiğimizde Add Roles and Features Wizard ekrani geliyor karşımıza Hyper-V rolü ile birlikte Remote Server Administration Tools özelliği içinde bulunan Hyper-V Management Tools ve altinda bulunan Hyper-V Module for Windows PowerShell, Hyper-V GUI Management Tools özelliklerinin kurulması gerektiğini belirtiyor bizlere kurulumu devam etmek için Add Required Features diyerek Remote Server Administration Tools altinda bulunan bu özelliklerin de kurulmasi sağlıyoruz.
Hyper-V rolü kuruluma hazir Next diyerek devam ediyoruz.
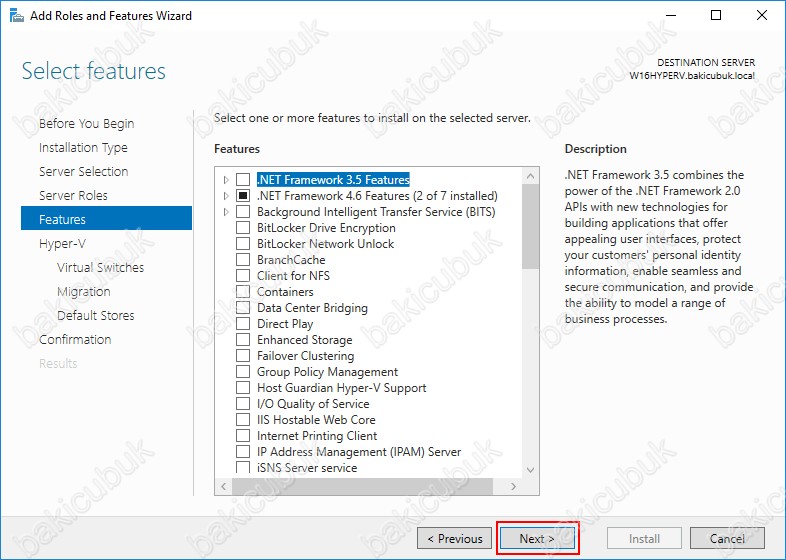
Select features ekraninda Hyper-V rolü ile birlikte kurulacak olan Features ( Özellik ) görüyoruz. Hyper-V rolünün kurulumu için herhangi bir Features ( Özellik ) gerekli olmadiği için bu ekranda herhangi bir şeçim yapmiyoruz ve Next diyerek yapılandıramaya devam ediyoruz.
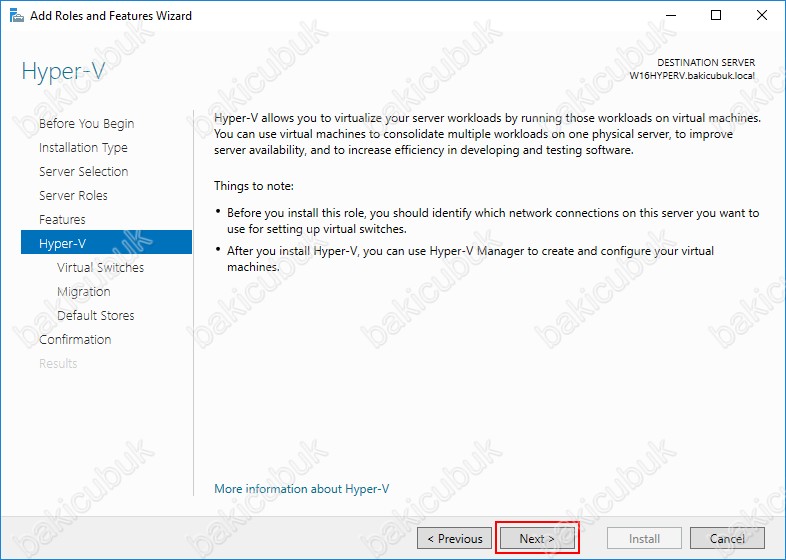
Hyper-V rolü ile ilgili özet bilgi ekranına göz atıp, Hyper-V rolünün kurulumuna devam etmek için Next diyerek devam ediyoruz.
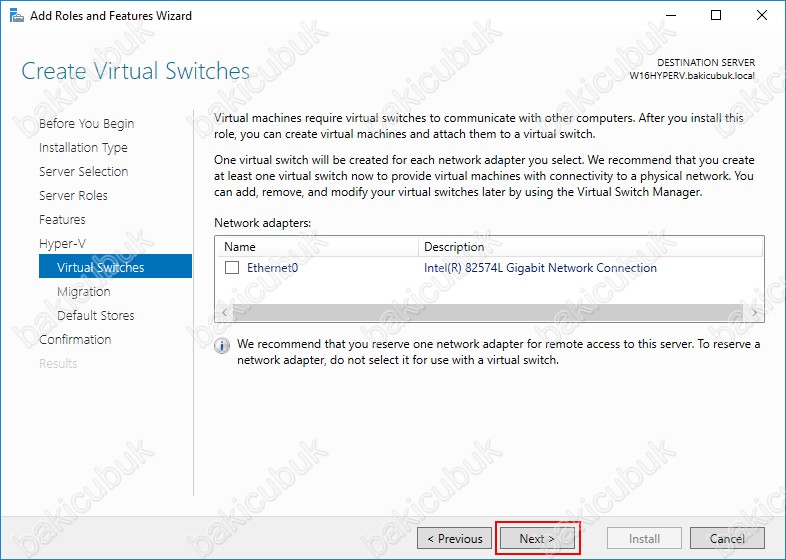
Create Virtual Switches ekraninda Hyper-V içinde kurulumunu yapacağımız sanal sunucularimizin ağ protokolleri ile kendi aralarında ve ya dış dünya ile haberleşmesi için gerekli olan bir yapılandırmadir.Sanal sunucularimizin ağ protokolleri ile kendi aralarında veya dış dünya ile haberleşmesi için hangi fiziksel network karti üzerinden haberleşmesi için bir Virtual Switch yaratmak istiyorsak,aşağıdaki ekranda bulunan fiziksel network kartini ve ya kartlarini seçebiliriz. Virtual Switch yapılandırmasini Hyper-V kurulumundan sonra Hyper-V Manager konsolu yardimiyla yapılandırabilirsiniz. Virtual Switch’ler konusunda yeterli bilgi sahibi değilseniz bu adımda herhangi bir seçim yapmadan geçebilirsiniz.
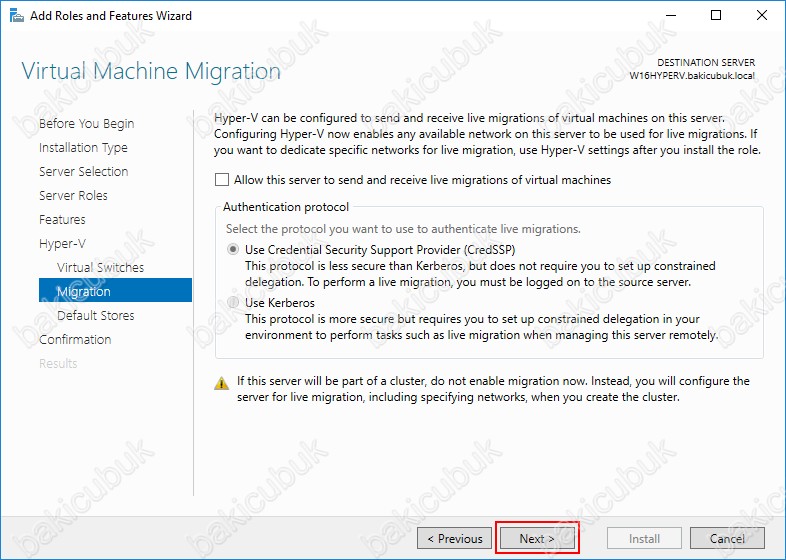
Virtual Machine Migration ekraninda de,söz konusu Host için Paylaşımsız Canlı Aktarım – Shared-Nothing Live Migration gönderimlerinin kabul edilip edilmeyeceği ile ilgili seçim yapabilirsiniz. Bu seçenekte daha sonra yapılandırılabilir bu nedenle Virtual Machine Migration konusunda yeteri kadar bilgi sahibi değilseniz herhangi bir seçim yapmadan devam edebilirsiniz.
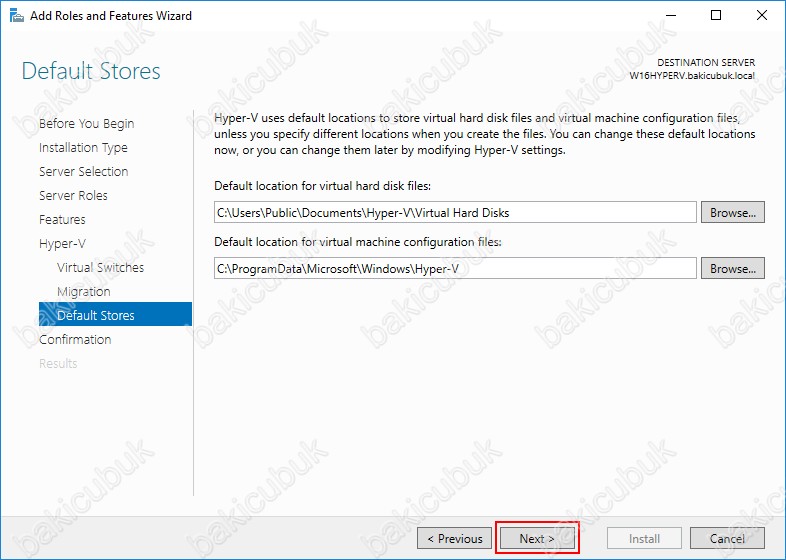
Default Stores ekraninda kurulumunu yapacağımız sanal sunucularimizin kurulum işlemleri sirasinda bileşen dosyalarının XML, VHD,VHDX bulunacağı dizinleri belirtebiliriz. Kurulumunu yapacağımız her bir sanal sunucu default olarak bu dizinlere kurulacaktir. Sanal sunuculari kurulum sirasinda bu dizinler dişindada herhangi bir farkli dizin içinede kurulum yapma şansim olduğunu belirtmek isterim. Next diyerek devam ediyoruz.
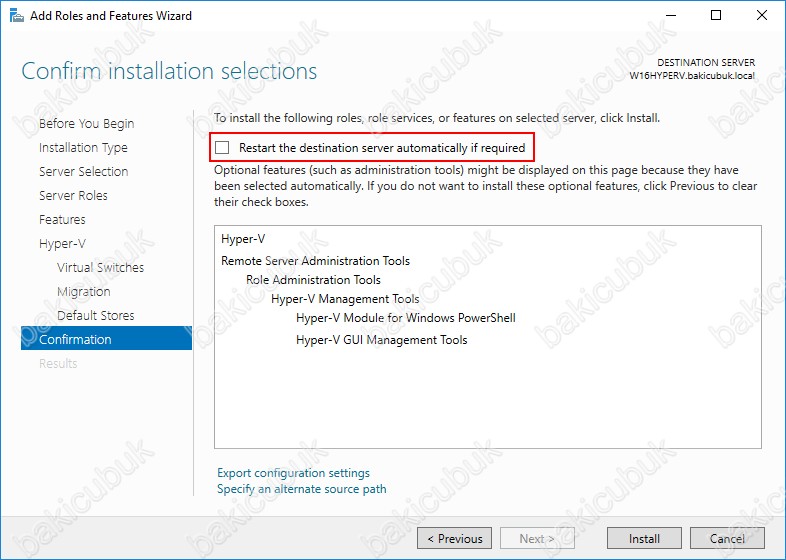
Confirm installation selections ekraninda Install diyerek Hyper-V rolünün kuruluma başlatabiliriz. Hyper-V rolünün kurulumu tamamlandiktan sonra sunucunun otomatik olarak restart etmek istersek eğer Restart the destination server automatically if required seçeneğini işaretlememiz gerekiyor.
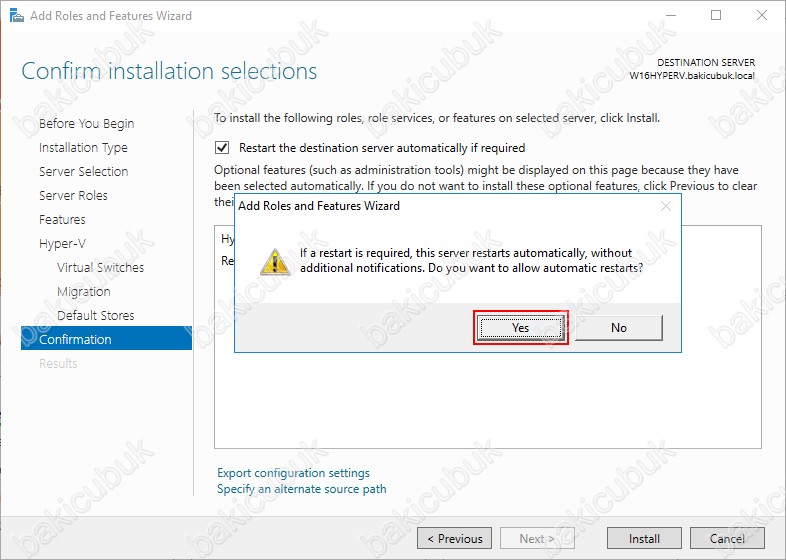
Add Roles and Feautures Wizard ekranı geliyor karşımıza Hyper-V Roles ( Rolü ) kurulumdan sonra sunucumuzu restart etmek içn Yes diyoruz.
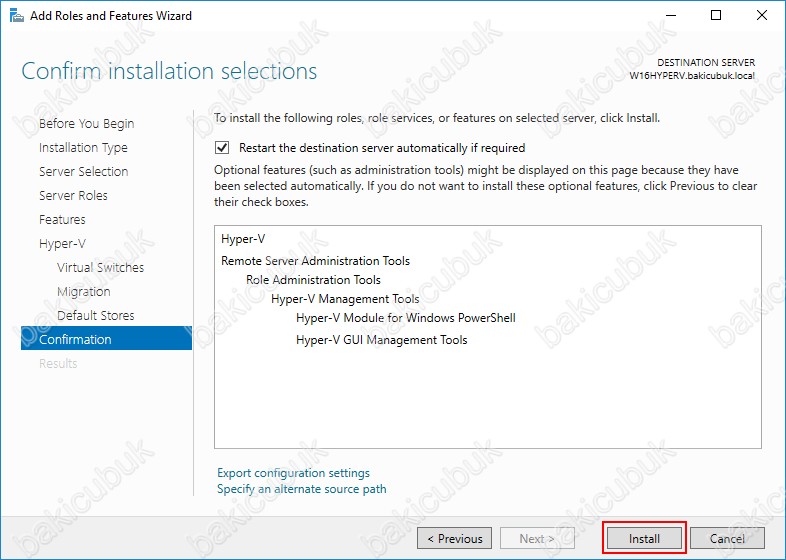
Confirm installation selections ekraninda Install diyerek Hyper-V rolünün kuruluma başlıyoruz.
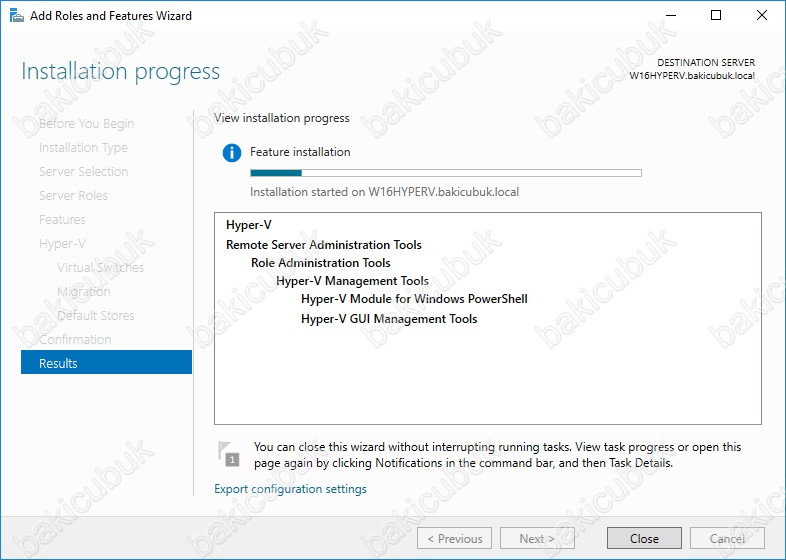
Installation progress ekraninda Hyper-V rolünün kurulumu görüldüğü gibi başladığını görüyoruz.
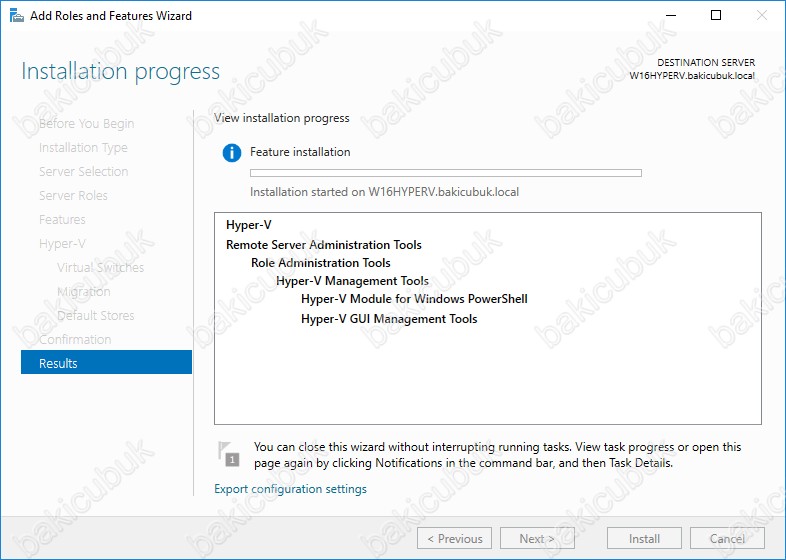
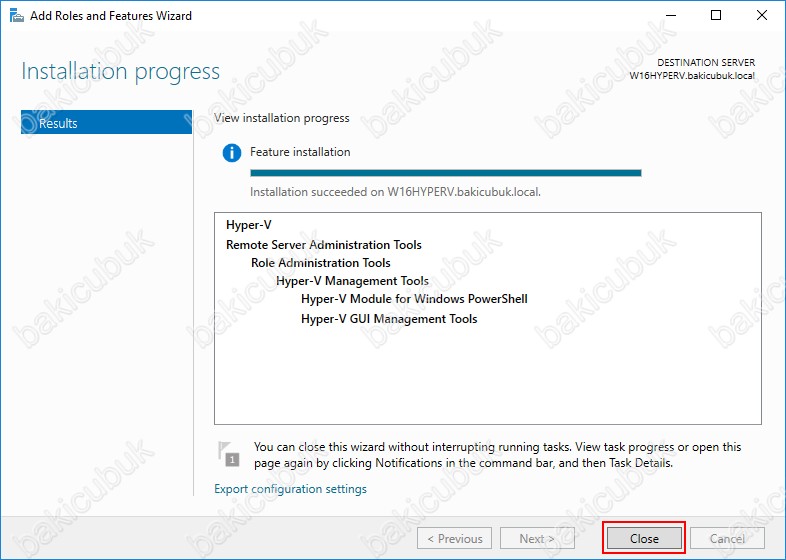
Installation progress ekraninda Hyper-V rolü ve Remote Server Administration Tools özelliği içinde bulunan Hyper-V Management Tools altinda bulunan Hyper-V Module for Windows PowerShell, Hyper-V GUI Management Tools özelliklerinin kurulumunun tamamlandiğini görüyoruz. Close diyerek Add Roles and Feautures Wizard ekranini kapatiyoruz.
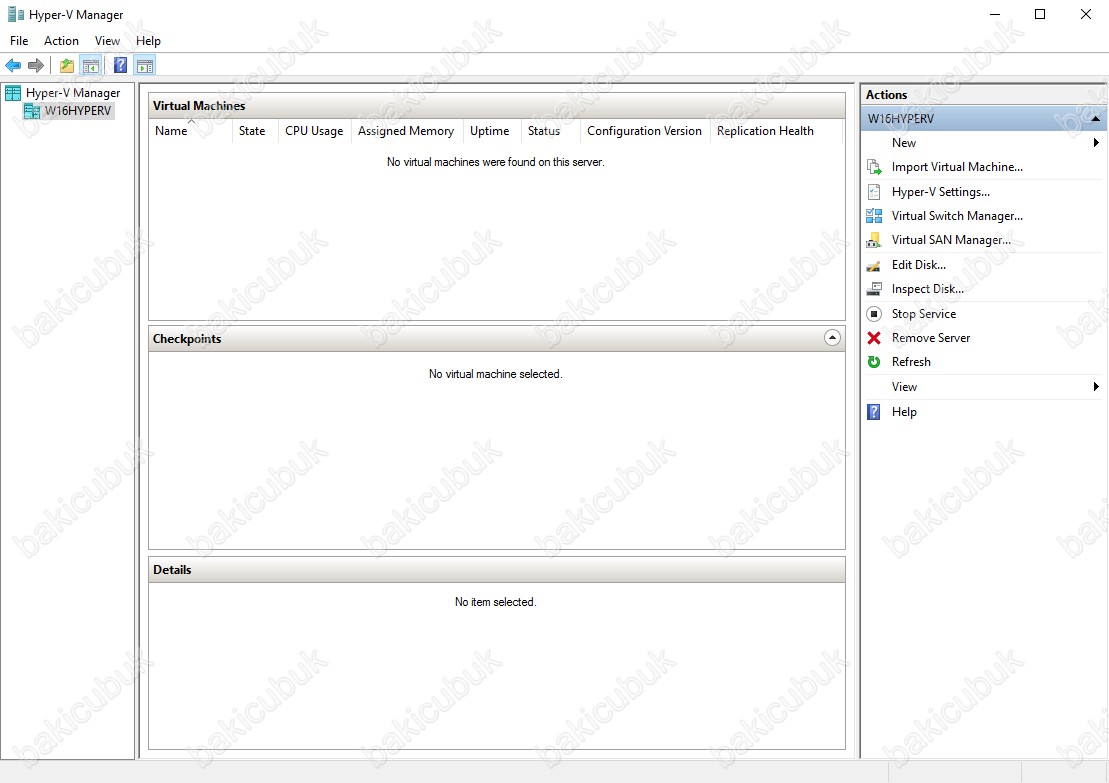
Windows Server 2016 üzerinde Hyper-V konsolu aşağıdaki gibi geldiğini görüyoruz.
Başka bir yazimizda görüşmek dileğiyle…